Monday, December 9, 2013

Xyron 30 Days Of Holiday Project Ideas Part 2!

Good morning friends and welcome to 
Xyron's 30 Days Of Holiday Project Ideas Part 2!
Well Part 2 from me that is. I created this these 
Christmas Candle holders.
 With all these paper projects that make home decor items
it's really hard to find the perfect adhesive for the larger
die cuts and intricate cuts as well and one that makes it easy
and you know will LAST!!
This is where the  Xyron 9" Creative Station comes in handy!
 So today I am going to share my secret- and how to create your own 
Christmas candle holders. (I used electric tealights not real fire).
Use die cut machine to cut out Christmas Candle Holder shapes.
Or handcut from templates online (there are hundreds!)
Carefully remove die cuts from matting. 
Place Candle Holder die cuts into Xyron 9" Creative Station
Rub over intricate shapes and cuts very well to remove all excess adhesive. 
Place adhesive side down onto iridescent paper or vellum. 
Trim off excess with scissors. (This leaves a lovely iridescent window!)
Use your Xyron Mega Runner to apply adhesive to the edges. 
Assemble Candle Holder. 
Add glitter and stickles as needed or desired. 
That's it! Easy and functional and if you pack them away right, they
will last for years! You would be surprised at how many project I have 
from years ago that I used Xyron on and they still come out every Christmas!
I love the window too- perfect for the holidays and a soft accent. 
For this project I used the :Xyron 9" Creative Station, Xyron Mega Runner,
Crate Paper Bundled Up patterned papers, Silhouette Cameo, Stickles, 
and Clearsnap Glitter. 

I hope you have a wonderful Monday my friends, 
PLEASE come back and say hello!
I hope you enjoyed my project idea! I was excited to share it!

Don't forget to hop onto the other days of ideas from
the incredible designers!
Photobucket

Friday, December 6, 2013

Special Tags for Special People

Good morning friends, 
what a crazy week, I am so thankful it is FRIDAY! 
Ready to get our Christmas tree this weekend and decorate the house. 

I took some time to craft this week in fact I have several projects to share
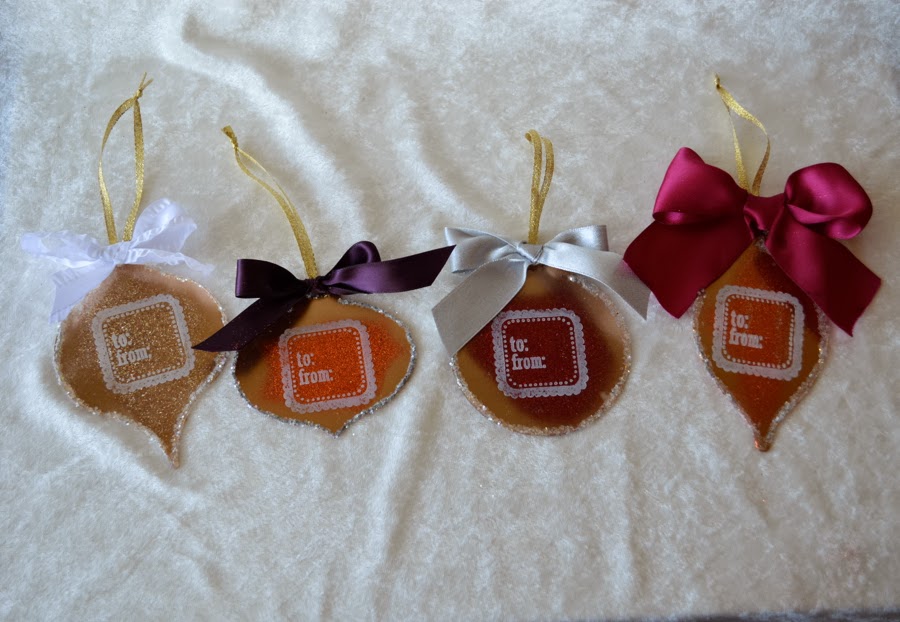
in the upcoming week. This is the first one- these special glittery tags
I created using the new Creating Made Easy December Kit!


I glittered the backs- sealed them, then stamped on the front using white StazOn. 
They were easy and look fantastic! :) I might even use them as ornaments? 

Ok busy day ahead my son is knee deep in archery, and my other son is sick
so momma is going to try to get a cat nap today. 

Photobucket

Wednesday, December 4, 2013

Altered Christmas Project~

Good morning friends, 
What a trying week so far it's been nice to sneak away and create!
I created this clipboard that my sweet son gave to me. 
 It was old and he just thought he wanted me to make it pretty so I did!
And as a bonus the ornament strip is a dry erase board too!
For the Clear Scraps Ornament strip I turned it over- dripped alcohol ink
all over it, then ultra fine glitter before it dried. 
  I LOVE the effect. Then I turned it over and removed the protective film. 
For the clipboard instead of covering it with paint or paper I heat embossed the
clipboard before I papered it! I love the copper hues. It looks metallic. 
The ribbon on top is Ribbons Unlimited of course…
I know an altered clipboard is clique and everyone has them but
I still find them fun to make and I can't wait to add Christmas photos. 

Have a wonderful day friends! :) 
Photobucket

Tuesday, December 3, 2013

Featured Project- Gold Glitter Christmas Frame!

Good morning, and happy Tuesday. 
I am excited to share this Tri-Fold Frame project today because
it is the feature project for the Creating Made Easy December Kit!
Which means every kit will come with step by step instructions for this project!
I loved making it so I am happy to share!
Here is the kit in full and a link to the store:
 I did use everything from the kit except I added some paint and such from my stash. 
I cannot wait to add photos, I am thinking of using
a gold toned black and white of the kids with Santa. 
Ok go grab your kit! :) 
Happy Tuesday!

Photobucket

Monday, December 2, 2013

Christmas Clock Handmade With Xyron And Heidi Swapp!

Good morning and hello Monday!
It's already December 2nd, time for that Christmas Decor. 

I wanted to share a step by step tutorial today for this clock. 
 I know you can go anywhere and buy a cheap Christmas clock, 
but I love to create my own decor, so I went to Michaels and grabbed
a wood circle, and clock kit at 40% off and went crazy! :) 
 Every detail is mine and it costs me maybe all of 10.00!
Start with your wooden circle. I had hubby drill a 5/16" hold int he center. 
Now getting to the center of the circle was tricky but after that it was easy. 
 Spray paint the edges and sides GOLD because realistically
I didn't make it for Christmas if I didn't spray paint it GOLD somewhere! haha
After that I took these cool Color Shine pieces from the Heidi Swapp line.
I used the Color Shine mist to mist them. 
I lined u how I wanted the clock to look. 
My clock was almost 9" so I used my Silhouette to trim out a 8.5" circle
so the gold painted edges would show a little. 
And I used my Xyron 9" Creative Station to adhere to circle. 
I love the Xyron 9" Creative Station because the adhesive coverage
is perfectly even- no bubbles, no warping just adhesive!
I used the Color Shine mist to add a little coordinating color on the clock. 
Wiped off the excess then applied the sticker circle. 
Then I punch out the hole in the middle. 
Then I added the clock bases leaving the hands off. 
Now run the banner and Color Magic accessories through the 
Xyron 9" Creative Station- press and rub firmly.
How adorable is this embossed Color Magic circle in the center? I love it!
After I applied the Color Magic Circle-  I put the clock hands on. 
Because I wanted to be able to know if they touched the embellishments. 
Now apply the banner and flowers. 
Put the rub-ons on the face of the clock. 
Use the Xyron 3/16" Adhesive Dots to apply the pearl strand.
Now remember that adhesive sheet from the 8.5" circle? The one from the
Xyron 9" Creative Station? These are perfect for sticking alphabet onto so you can spritz them!
I stuck them right on the sheet, then peeled them off. 
Now because I over misted mine- I had to wipe the backs off and 
apply more adhesive. Normally I would just lightly mist them and peel them 
off when dry- but I went crazy LOL 
Anyways I simply wiped off the back and ran them through the
Then take a ruler and apply the numbers. 
Add liquid pearls or stickles if desired.
The clock kit came with a hanger so it hangs perfectly!
I cannot wait to hang it up!
You can find more posts from the Xyron team at
https://www.facebook.com/xyroninc
or http://aintshecrafty.blogspot.com

Happy Monday friends! :)
Photobucket