
Morning everyone!
Sorry I missed yesterday;s blogging.
I had some emails of concern, but honestly
I was just so busy with that TV spot.
I am working on 5 projects right now but
I cannot share any of them except one and it's not finished
so I thought I would share a quick tutorial
that several of you have asked about.
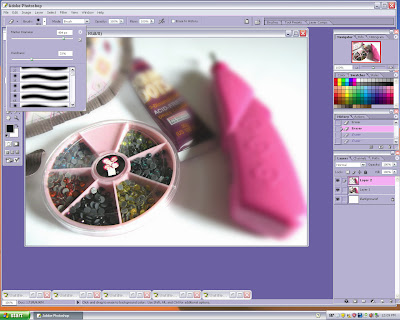
How to BLUR the background of you photo
and make one focal point.
This is the orginial photo
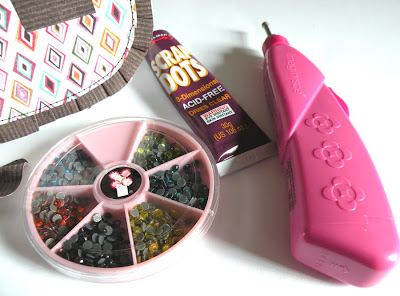 I just took it for an example.
Step 1. Select entire image and COPY
Then click NEW LAYER and PASTE
it should look exactly like the original photo
 Step 2. Select FILTER and use drop down menu
select BLUR then GAUSSIAN BLUR *that is the one I use but
you could use any one you choose*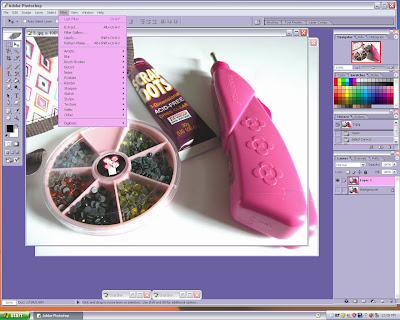 Step 3. Adjust blur.
 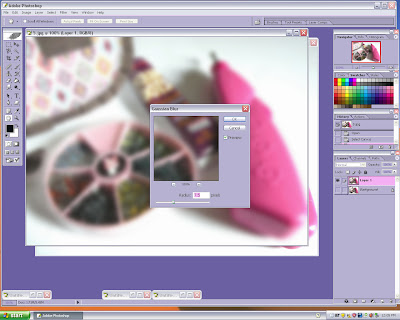 Now your photo should look like this.
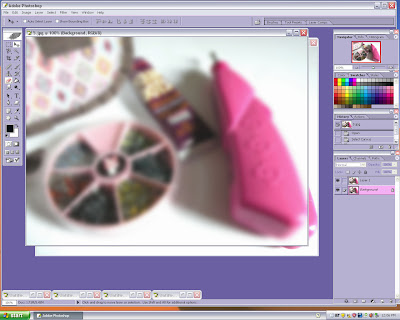 Step 4. Select ERASER and size brush you are comfortable with.
Now ERASE area you do not want blurred.
On smaller photos or spots, I ENLARGE the photo by pressing
CTRL and + to zoom in.
 And this is the final photo.
Probably not the best photo to illustrate this LOL
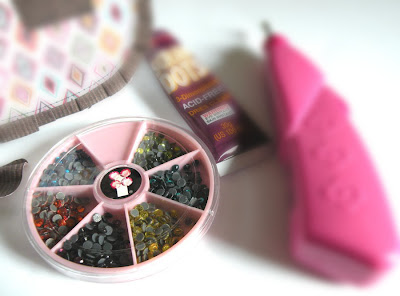 But you get the idea. This is how I do it anyways :)
You can play with the eraser and everything else to make
it all yours!
Now I will be back tomorrow.
I do believe my friend MARCI gave me a GIVEAWAY
and it's a big one too! :)
When the TV spot gets online I will link y'all up!
It's coming I am told LOL
If not I will get a copy and youtube it!
~Have a great Wednesday~
~Pinky~
I had some emails of concern, but honestly
I was just so busy with that TV spot.
I am working on 5 projects right now but
I cannot share any of them except one and it's not finished
so I thought I would share a quick tutorial
that several of you have asked about.
How to BLUR the background of you photo
and make one focal point.
This is the orginial photo
 I just took it for an example.
Step 1. Select entire image and COPY
Then click NEW LAYER and PASTE
it should look exactly like the original photo
 Step 2. Select FILTER and use drop down menu
select BLUR then GAUSSIAN BLUR *that is the one I use but
you could use any one you choose*
 Step 3. Adjust blur.
  Now your photo should look like this.
 Step 4. Select ERASER and size brush you are comfortable with.
Now ERASE area you do not want blurred.
On smaller photos or spots, I ENLARGE the photo by pressing
CTRL and + to zoom in.
 And this is the final photo.
Probably not the best photo to illustrate this LOL
 But you get the idea. This is how I do it anyways :)
You can play with the eraser and everything else to make
it all yours!
Now I will be back tomorrow.
I do believe my friend MARCI gave me a GIVEAWAY
and it's a big one too! :)
When the TV spot gets online I will link y'all up!
It's coming I am told LOL
If not I will get a copy and youtube it!
~Have a great Wednesday~
~Pinky~
13 comments:
Thanks for the tutorial, love to play around with that stuff.
Hope everything went well with the interview sweetie.
Thanks for sharing. Now I won't have to clean the house before I take pictures.
I can just blur out the mess in the background. You're a genius!
LOL perfect!!!!!!! hehehe
Great tutorial!! I am going to give this a try. Thanks!!
ooh, fabulous, Pinky!
and i TOTALLY lullzed at Scatter's comment! brilliant! :D
hope the TV spot went well, sugar! (i'm sure it was fantastic!)
You are so nice to find time in your busy life to answer peoples questions. I am so excited to see your TV spot. Are sure hope it comes SOON!
How awesome is this!!! Thank you for the How To....I am off to play and see what I come up with!!!
Have a great day sweet friend!!!
Great tutorial!!! I never know what to "do" with Photoshop beyond the basics. That is a cool trick :)
Pinky,
I missed the show!! :-( Do you have a more specific link? When I get to the Midday web site, I cannot click on the next one for Scrapbook Village. Keeping my fingers crossed!
Marianne #6701
Thanks Pinky! I look forward to seeing your TV debut :o)
Way cool tut! I am intrigued with the products in the photo lol. I have a couple questions for ya, 1.) How does the iRock tool work exactly, I can't figure it out. and 2.) Does that glue in the photo work really well? I've never seen it before.
I was looking like a nut over there to see but nada yet.. So I'll wait for the 411
as my friend says "coolio" :-)
Post a Comment