Monday, December 5, 2016

Two Christmas Card Tutorial

Hell my friends friends, I am excited to share 2 different holiday cards I created using the Creating Made Easy December 2016 Kit today! Yes, I even have a photo step by step tutorial for you to create your own. 

For the first card I took a card base I had but you could use any card stock base and create your own. I traced the Mini Tree from the Tree Album in the kit and cut it out of the center of the front of the card just slightly larger then the Mini Tree. 


After that I covered the front of the card with My Mind's Eye paper from the December 2016 Kit and then trimmed out the tree pattern.


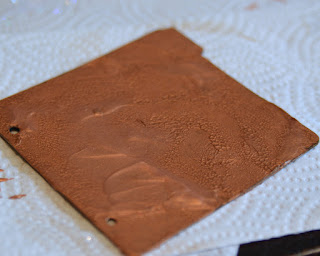
I took one of the pages from the Tree Album and took of the protective film, then inked the tree using StazOn ink from my ink stash in my craft room.


While it was wet with ink I lightly sprinkled on glitter and let it set 5 minutes, then I added pearls with my Pearl Pen. 

I covered the inside of the card using My Mind's Eye paper from the kit, and punch a hole above the tree cut out on the face of the card.

I used Bakers Twine from my personal craft stash to tie the tree to the front of the card. It actually is easily removed to become a beautiful shimmering ornament. 
I then added the sentiment to the front, which I cut from the My Mind's Eye patterned paper. 

For the second card I simply took 2 of the pages from the Mini Tree Album and adhered pattered paper to the back of one tree (after removing the protective film) and a sentiment sticker to the front of the other tree, trimmed off the excess and inked the edges using StazOn Cotton White ink.

I covered the front of my base card (from my stash) using the patterned paper in the kit, and added a snowy red glitter border on the bottom.
Then used pop dots to adhere the top tree and Beacon Adhesive to adhere to tree underneath.
This December 2016 Kit just made me ready for Christmas Crafts!
Saturday, December 3, 2016

Snowy Forest Scene Layout Display


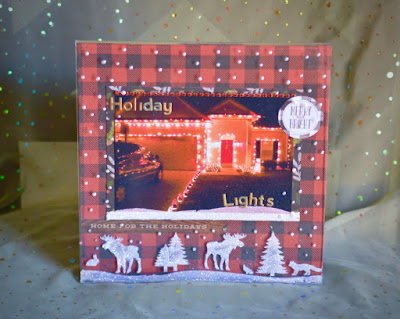
Happy Saturday my friends, I am here today with the Creating Made Easy Featured Project for the month, this Snowy Scene Stenciled Page Display with a fun wintery Holiday Lights 8x8 Layout. My very first December 2016 Creating Made East Kit project!

The Feature Project means every Creating Made Easy December kit ordered will arrive at your doorstep with step by step instructions to create this project, including exactly how I stenciled the Page Frame. 

Have you seen the beautiful detailed in this 6X6 Rustic Forest Mascil (Stencil)? Its absolutely one of my favorite Mascils that Clear Scraps has ever designed! Not only the beautiful snowscape but the moose, bunny, and coyote all there together. 
For those I used Modeling Paste and glitter (of course) and a white Pearl Pen. 

I cannot wait to make other layouts to slide in and out of this display, I am going to use it all winter long. 
The layout I also used the 6X6 Rustic Forest Mascil, I just used the snowmen, and left out the trees and forest creatures.

I absolutely love winter crafting and this kit made me feel like I could stay in a cabin all winter just to decorate it. You might not love snow, but the beauty of it is amazing and fun for all Christmas and winter projects. Loving the My Mind's Eye in this kit, the paper is fabulous.
Grab yours while they last!
I cannot wait to share the other projects and I have seen the new designers, they are amazing!

Friday, November 18, 2016

Perfectly Clear Fall Colors Layout

Hello again friends what a beautiful fall we are having in Nashville, Tennessee this year (minus the drought), which made the Creating Made Easy November Kit all the more fun (as it is usually!) this time. 
I have a fun layout today that is completely clear Fall Colors Acrylic Layout using the November Kit.
If you would like to create this layout, I have step by step instructions. 
  • Using patterned paper from the November Kit (Creating Made Easy) punch out several 1" leaves using any fall leaf punch (I used one from my stash or a cutting machine would work as well).
  • Peel off the protective film from the Clear Scraps 12X12 acrylic sheet (only the front for now).
  • Trim out 12X7" piece of patterned paper as shown in photo. 
  • Adhere 12X7" paper to front of acrylic using Beacon adhesives. 
  • Trim out 4X6 matte using patterned paper from the kit. 
  • Adhere matting to paper as shown, add photo (trimmed to size).
  • Take paper punched leaves, adhere them down right had side. 
  • Take buttons(from stash or previous kits) and place them as shown amidst paper punched leaves. 
  • Add FALL COLORS sticker from the November Kit sticker sheet. 
  • Take gold 3/4" ribbon (from stash) and adhere under photo matting. 
  • Take "But I think I love Fall Most Of All" sticker and stick to a leftover scrap of patterned paper. 
  • Trim around stick leaving a 1/4"  edge. 
  • Using pop dots, add sticker on right hand side of photo as shown. 
  • Adhere a couple buttons to the left hand side of the ribbon. 
  • Using StazOn ink (from stash) or paint would work as well, and edge entire layout. 
  • Remove protective film from the back of the layout. 

Such a fun and easy layout when you break it down piece by piece, and I love acrylic layouts in my books, they are so unique and creative.
You could replace any of the stickers or sentiments wither choice from this packed kit!


Wednesday, November 16, 2016

Mustache Holiday Tree?! Hipster Fun Project

Hey there friends, I have kind of an unusual fun project to share for MOVEMBER- if you had not heard of Movember- it's really all about mustaches in November. 
I thought it would be fun to make a Hipster Holiday Tree and Card for one of my mustache fanatic friends to celebrate men's health. Such a great idea, why not have fun with it.
I wanted it to be masculine yet still shine for the holidays, so I painted the 3D Chipboard X-Mas Tree black then used metallic gold paint to stencil on the Mustaches Mascil/Stencil. Then I added black pearls.
For the card I used a black shimmer cardstock, that I fitted to the Acrylic Coaster and added 1" at the top for the border punch and fold over. 
It was a fun little kitchy project to create and perfect for November, I can't wait to see my friend's face, it is the holiday season and all sorts of decor goes, why not make it YOURS!
I hope you like my fun project today, happy November friends.
Until next time, keep on checking the Clear Scraps blog and mine for more project ideas, and keep checking back for even more new releases!


Tuesday, November 15, 2016

Blessed & Grateful Fall Card

Hey guys, today with one of my November kit projects, 
this fall themed "Blessed and Grateful" card that I created using 
the Blessings Chipboard Expression from the 
I started with a card stock base card (from my stash), 
and created a copper shimmer card stock cover using my own card stock, 
and then used the pretty maple leaf patterned paper for the front. 
I spray painted the Blessing Chip Word with gold metallic 
paint then lightly rubbed some brown 
StazOn on the word to bring out the texture. 

I also rubbed the StazOn ink along the edges of the card. 
I used the stickers from to kit to create the card itself and 
added the "and" from the letter stickers. 
This would make a great Thanksgiving Card for a family 
or best friend of course. The Blessed Chipboard 
would make a fantastic title on a layout, card, even a sun catcher, any thing  is possible.
Grab your kit while it's here!
Cannot wait for December and all the winter/Christmas CRAFTING!

Thursday, November 3, 2016

Autumn Blessings Acrylic Box & Tag Album Set

Hey there friends it's Pinky today, I am so excited for FALL!
I have so many fun projects to share including this fun Clear Scraps Acrylic Box and the Chipboard Tag Album I created as the Feature Project for this month. The Creating Made Easy November 2016 Kit was an amazing kit to wok with, I love fall but also I LOVE the grateful side of the season, celebrating blessings, with family and friends. 


For this project I created a step by step tutorial that is included in each kit, I shared how I created everything from each tag to the box itself. 
I decided to turn the tags into a mini album that fits in the box, so I can proudly display it until after Thanksgiving.Each Tag includes room for a photograph, and I used an oil paint Sharpie in metallic gold as an accent color. 
The patterned paper from Reminisce are so cute, and these stickers, you are going to love!
This Creating Made Easy November 2016 Kit was just fabulous. 
Every Kit I receive I am amazed at how many projects I can create,and I always have leftover papers to play with and make extra cards or layouts. 
I hope you enjoyed my project today, I will be back with more this month!
Until next time, have a beautifully crafty day my friends. Here is a link to the kit so it is easily found. 

Saturday, October 8, 2016

BOO Crackle Spiderweb Album

Happy October my friends, today I have a fun BOO Spiderweb Crackle Album!
For this mini I took the 4X4 Mini Tab Album from the October 2016 Creating Made Easy Kit, and I coated the cover page with StazOn ink (in case the crackle showed through)
and I used Texture Crackle Paste from my stash in copper to cover the front page.
While I set that aside to dry I covered each page with patterned paper from the October 2016 Creating Made Easy Kit.
After the Texture Paste completely dried I used black paint to "ink" the edges for a spookier feel.
After that I stamped spiderwebs on the cover, I actually used paint instead of ink for this one.
I put stickers from the kit on each page-prepping them for photos. 

And added the BOO from Corrugated Alphabet Stickers from my own stash. (We all have alphabets stickers!)
I threaded it with a thin black ribbons and added pics!
I love the end result and it wasn't hard to create.
Until my next project, have a beautifully crafty day my friends, 
Pinky- your average ordinary craft mom!

Monday, October 3, 2016

Halloween SHAKERS!!


Happy Monday friends, today I have my first couple of projects from the fabulous Creating Made Easy October 2016 Kit!

I decided to make these two Clear Scraps Shakers and share just how I created them!
For the Bat Shaker I used Gesso from my stash, spreading it onto the chipboard base and basically using it as adhesive to adhere the next layer. 


After thatI spread Gesso on the top layer piece, and set aside both pieces to dry. 

Then I took heavy duty foil and punches out stars and moons (it sharpens your punches as well) to create the "floating" pieces in the Shaker. 


Right before the base Gesso dried I put two foil moons as the "eyes" and pressed them in lightly. 
I waited for everything to dry added the foil stars and adhered the acrylic and top layer on, after gluing some ribbon in between the layers for a hanger. Before I added the acrylic I hand painted some spider webs onto the front using paint and a very small brush. 

Now for the Ghost Shaker I used Modeling paste from my stash with glitter (while wet) for the top layer. 


I adhered patterned paper from the kit to the base of the Ghost Shaker.


After everything dried, I adhered a ribbon in between the layers, added the sequins from the kit, then adhered the other layers. 


Such a fun idea, these Clear Scraps Shakers!
Happy Crafty Monday my friends, 

Monday, September 26, 2016

Fall Mixed Media Acrylic Tag

Hey there friends, well this TAG project taught me a lot! LOL
I tried using this copper paste on  it, but it kept flaking off, I was using the Clear Scraps
Fall Leaves Stencil/Mascil which I love. 
But I had to find a way to keep the paste from flaking, so finally 
I "frosted" the tag by using a file to scratch the surface. After I did that the 
paste stayed on but I was sure to seal it with a clear acrylic spray.

glittered and added them for more texture. 
Both the Mascil/Stencil were in the September Creating Made Easy Kit Club Kit 
plus a whole bunch of amazing other items!


Friday, September 23, 2016

Micro Bead Owl Album

Hey there friends, I have the Featured Project for the month of September with the Creating Made Easy kit. This fun micro bead "Lets Go Owl Album" which includes fun photo matting that matches the kit paper cards that were my inspiration. 
Creating Made Easy September Kit Owl Album Pinky Hobbs4
Check out the photos below, each page it individualized with fun "tree" mattes that coordinate with the paper cards in the kit. 
Creating Made Easy September Kit Owl Album Pinky Hobbs1
Creating Made Easy September Kit Owl Album Pinky Hobbs7
I had so much fun with this kit in general plus the album was just a pleasure to create. 
Creating Made Easy September Kit Owl Album1 Pinky Hobbs3
Every kit comes with steeply step printed photo instructions to create this album from the front page to the last page! I enjoyed taking photos and making every detail fun. 
Creating Made Easy September Kit Owl Album Pinky Hobbs5
Have you seen everything in the kit? I included posts for backpack tags as well and pics included in those posts. 
Here is a link to the Creating Made Easy September Kit
The owl was so cute, so many ideas.