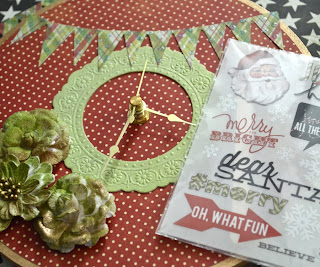
Good morning and hello Monday!
It's already December 2nd, time for that Christmas Decor.
I wanted to share a step by step tutorial today for this clock.
I know you can go anywhere and buy a cheap Christmas clock,
but I love to create my own decor, so I went to Michaels and grabbed
a wood circle, and clock kit at 40% off and went crazy! :)
Every detail is mine and it costs me maybe all of 10.00!
Start with your wooden circle. I had hubby drill a 5/16" hold int he center.
Now getting to the center of the circle was tricky but after that it was easy.
Spray paint the edges and sides GOLD because realistically
I lined u how I wanted the clock to look.
My clock was almost 9" so I used my Silhouette to trim out a 8.5" circle
so the gold painted edges would show a little.
is perfectly even- no bubbles, no warping just adhesive!
I used the
Color Shine mist to add a little coordinating color on the clock.
Wiped off the excess then applied the sticker circle.
Then I punch out the hole in the middle.
Then I added the clock bases leaving the hands off.
Now run the banner and Color Magic accessories through the
How adorable is this embossed Color Magic circle in the center? I love it!
After I applied the Color Magic Circle- I put the clock hands on.
Because I wanted to be able to know if they touched the embellishments.
Now apply the banner and flowers.
Put the rub-ons on the face of the clock.
Now remember that adhesive sheet from the 8.5" circle? The one from the
I stuck them right on the sheet, then peeled them off.
Now because I over misted mine- I had to wipe the backs off and
apply more adhesive. Normally I would just lightly mist them and peel them
off when dry- but I went crazy LOL
Anyways I simply wiped off the back and ran them through the
Then take a ruler and apply the numbers.
Add liquid pearls or stickles if desired.
The clock kit came with a hanger so it hangs perfectly!


