Tuesday, October 21, 2014

Affirmation Frame: I Am Beautiful....

There are so many things that are special to my heart, from 
crafting to Autism, abuse advocacy, kindness and also empowerment of
others. Including not feeling ashamed of being who you are, plus size, skinny, abused,
Christian, pink haired, tattooed, anything that is true to you. 
On my mind this week was a conversation with a few friends that I love
and my journey to become truly happy with myself which included
putting away the scale and not telling myself how ugly I was when I look in the mirror. 
That's a hard thing to teach yourself after year of abuse. 
 But I feel like the journey I have taken has enabled me to have true compassion for
others who might have walked my journey and have pain. 
 I was touched by a friend who didn't want to compare her pain to mine
when I firmly believe that all pain is pain and it's all relevant and shapes us so
your pain might be less then or more than mine but I still respect that pain. 
I decided to make her this frame- as I created it, I felt the love in my hands and
as I kept adding more embellishments the more happy it made me.
which is 18" LONG! I love it!!
I wanted her to see this every day and remember that she is incredibly 
beautiful and others see it.
This is how I created it, I would love to know if you decide to make one!
  1. Separate XL Rectangle Deco Top Frame and using Krylon Coral paint, spray paint chipboard base.
  2. Using Clear Scraps 12" Heart Arrow Mascil/Stencil and Krylon metallic paint (Brushed Nickel) spray paint edges and stencil onto base. 
  3. Take white paper flowers of all sizes and the 2 Krylon paints, paint them using both.
  4. Using lace- adhere lace around edges onto chipboard (not on acrylic top frame) and trim off excess. 
  5. Take acrylic top layer of frame and remove protective film. 
  6. Using paper lace tape- add accents to top and bottom of acrylic as shown in the photo. 
  7. Where you are placing flowers and accents use hot glue to adhere acrylic top layer to chipboard layer. (remember you will cover the hot glue with flowers and other accents so no glue will be seen)
  8. Hot glue gold sequin strand around inside edges. 
  9. Layer flowers using buttons and pearls, I used foam pop dots to lift them up. 
  10. Adhere to frame as shown using hot glue. 
  11. Add crystals and keys. 
  12. On the back add picture hanger. 
  13. Take Thickers fabric letters, spray paint using BOTH paints. 
  14. HOT glue the letters to base- I don't use only the adhesive on the letters for any him decor I always add hot glue or adhesive. 
That's it! Put your empowerment message inside and give to a friend.
A Bible verse if you are inclined or a prayer, anything that adds encouragement. 

Happy Tuesday friends. :)
Photobucket

Thursday, October 16, 2014

First Days...

Well hey there Thursday! Man this week has been crazy
from rain and flooding and getting stuck in the mud to fun trivia nights!
I still manages to get crafty ad create this page, 
Yes you guessed it, it's digital, I always go back and forth from digi to paper.
I love being able to play with both, and also do the altered crafts. 

Just reminiscing about school days...is winter break here yet? LOL
Photobucket

Tuesday, October 14, 2014

Spooky Halloween Mobile!

Hey there, So I kept looking at the new Samantha Walker cuts and
it just kept popping out at me...I need to do something different with it. 

I ended up taking an old tape roll, painting it and making
the SPOOKY cut file into a Halloween Mobile with crystals so
technically it's a sun catcher too!
You can check out the full instructions on the Samantha Walker blog today
Photobucket

Monday, October 13, 2014

Spiderwebs, Krylon, And Clear Scraps!

Hello Monday! You dirty day...LOL 
Just going back to school from fall break and momma's tired...

Can you tell lately I am obsessed with spray painting acrylic? Well I totally am!
 Creating that digital layout last week completely inspired me to create
a real one using Clear Scraps XL Dazed Acrylic shape, Clear Scraps Spiderwebs 
Mascil and Krylon spray paint. 
I also used a Samantha Walker Cut File for the title. 
It felt good to create a page- I was feeling my crafty roots!
I have another Halloween project coming up tomorrow...so stay tuned. 
Photobucket

Thursday, October 9, 2014

Jack 'O' Lantern Owl Keychain

There was so many fun designs in the Creating Made Easy October Kit
I decided to take my leftover owl shapes and create a key chain with them. 
 I plan on printing up my kids Halloween photos from Instagram in 
1.5" and adding them so I can carry this on my key ring until Halloween is over. 
 Fun right?? I love these little minis from Clear Scraps!!!
It's just a few pages but that is all I need, so cool to have photos on my key ring
that I created myself. 

Photobucket

Wednesday, October 8, 2014

Giveaways With The Samantha Walker Blog Hop!

Welcome to the Samantha Walker Monthly Creative Team Blog Hop!

This month's theme is HALLOWEEN and while I was 
getting ready to create my project last week I ran across these photos
of Justice and Gage from one of their first Trick Or Treat nights, and
I couldn't help but just scrapbook them!

How adorable are their little faces? I just love it so much!
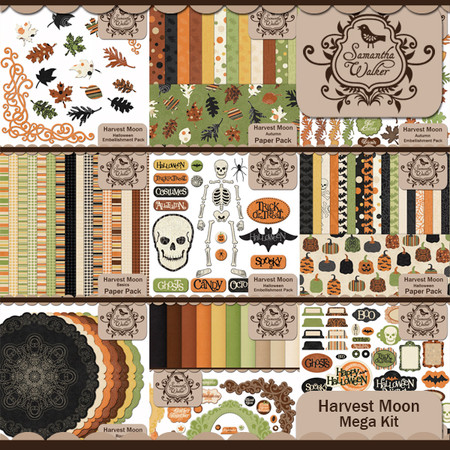
I actually used the Harvest Moon Mega Kit from Samantha Walker- 
such an amazing digital kit- precious!
It reminds me of days in the past when I scrapbooked pages all the time.
Anyways, there are so many great projects happening in this blog hop- and 
YOU COULD WIN! So keep on hopping my friends!

The blog hop will begin on Wednesday 10/08 at 12:01am MDT and you will have to comment by Sunday, 10/12 at 11:59pm MDT in order to be eligible for the free SVG/Silhouette file as well as the prize...which will be the Spellbinders Shapeabilities Expandable Patterns Die Fancy Lattice

This is the very cool FREE SVG file SW is giving away....
And you can enter for this wonderful prize!


Now head to Diana's blog for her fabby creation too!

Photobucket

Monday, October 6, 2014

TOO Cute To Spook!

Hello friends and hello Monday, it's Fall Break in TN so this week
I am tickled to spend with my sweet boys...love it!

I will be crafting all week. 
Here is another project using the Creating Made Easy October Kit
it's a mini keyring album and I love it!
Remember the Tic Tac BOO game I made?
I only used 4 of the ghosts from the album and I set one aside to make this 
keyring album. 
I used th either little acrylic tags to fill the rest of the album. 
FUN fun kit!

Have you grabbed your kit yet? I think this would also make and amazing window banner!

Photobucket

Friday, October 3, 2014

Owl Hair Bow W/ Tulle

 Happy FRIDAY friends!!! I am so happy this week is over LOL 
Fall break begins for us now, so excited to have my boys home. 

I am still working on kit projects from Creating Made Easy and I decided
to get a little wild with this kit, first I created the Tic Tac BOO game.
Then I decided to create this fall owl hair bow. 
Now I am not bow maker but this one just screamed to me 
In each kit you will find instructions for this bow as well as all
four of my projects!! WOOT! So happy about that. 
Here is the kit and it's a steal, grab it before it sells out, I just love it!

I sealed the glitter on the back of the owl so it's not loose glitter. 
I love the fall colors. 
Photobucket

Thursday, October 2, 2014

Tic Tac BOO Halloween Game!

Hey there happy Thursday, I told you I was creating this week!

October means a NEW kit from Creating Made Easy and I think this kit is
just tons of fun. I decided to create a Tic Tac BOO game using this kit and guess
what? They picked it and all my projects as the feature projects!
So in each kit you will get an instruction sheet for these and all my other
projects for the month!
I love Clear Scraps and Krylon paint, this was a fun project. 


Grab your kit before it's gone and let me know if you decide to make my projects! I am 
so excited, what a fun month!
Photobucket

Wednesday, October 1, 2014

IMAGINE A Tropical Life....

Hey friends, wow it's been almost a week since I had something new!
Thankfully I have been busy creating and have 5 projects to share so stay tuned. 

My first one for today is this wall plaque I created using Krylon and Clear Scraps. 
 My newest obsession is spray painting Clear Scraps and of course
as always a tropical vibe is good!
If you hit up the Clear Scraps blog today you will see a step by step
for creating this piece...
 I used the Clear Scraps Word Titles, Clear Scraps Mascils, and Clear Scraps Plaque.
Can you see the Mascil I used behind the IMAGINE?
 It's really cool "Keys N Locks" I love what it represents. 
I actually love this piece it reminds me of Hawaii and the whole thing makes me smile. 

Happy Hump day friends, stay tuned this week for more
 projects and be sure to check out Clear Scraps!!
Photobucket