Tuesday, March 11, 2014

Me? In A Magazine?? Scarlet Pink!

Hey there friends, 
**Warning** not craft related! LOL

I am very excited to share that I was featured in a magazine this month. 
I thought it was going to be a craft piece but instead they wanted it
to be more about me and my life and how I create. 
Anyways I just wanted to share with you. 
It's been an interesting year full of changes. Big life changes
and big well everything changes. So this is a perfect new venture as well. 
This and being photographed for a tattoo commercial (crazy right?) LOL

I am very excited- so please go check it out!
Rad style, rad publisher and rad articles!

Photobucket

Monday, March 10, 2014

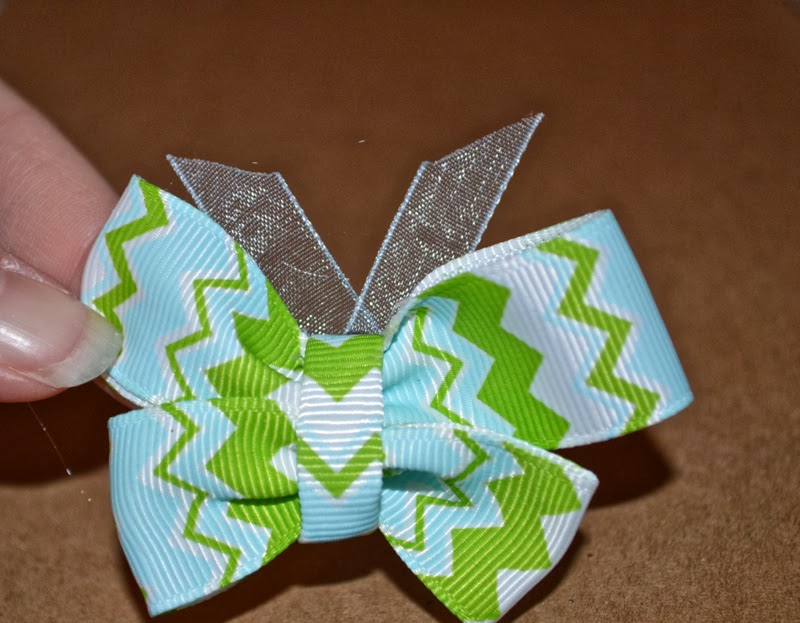
Making Ribbon Butterfly Hair Clips Tutorial

Hey friends, it is officially Monday and I spent the weekend
at the field doing photos. 
BUT I wanted to share this Butterfly Ribbon Hair Clip tutorial that I created
perfect for spring and that special girl in your life. 
I love how fun they are. 
I actually tried to find some ribbons butterflies online and
honestly I did not like them- any of them so I decided to make my own! :)
Trim out 7.8" ribbon 2 shorter and 2 longer. 
 Heat all edges.
Fold like a bow and stitch. 
 Stitch shorter tot he longer as shown. 

 Trim out a 1 1/2" piece of ribbon and 2 antennas.
 Tri fold 7/8" ribbon and glue. 

 Wrap around to cover stitching. 
 Adhere antennas behind, and add buttons on top. 
Adhere to a hair clip. 
That is IT! Fun and easy right?! 
Anyways I have fun projects coming all week so stay tuned!
Happy Monday friends~
Photobucket

Thursday, March 6, 2014

Spring Fun With Xyron, Miss Katie, and ...

Welcome to the Xyron, Miss Kate's Cuttables Blog Hop!
Can't wait for someone to WIN BIG this week.

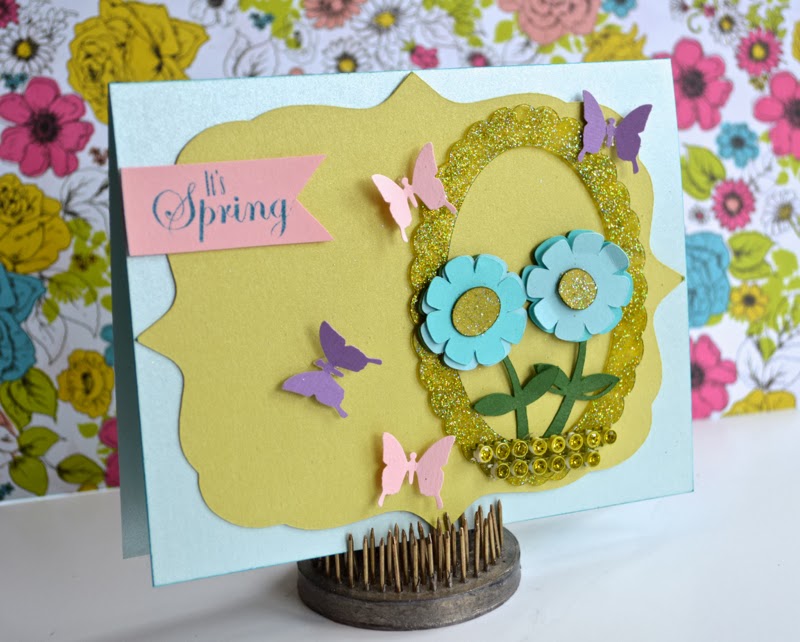
I have a step by step tutorial for this card I created and it's a fun one.
 Spring spring spring, bring on SPRING!
Cut Your background shape using Miss Kate's Cuttable Background Shape
with the CutCardStock Metallics. Be sure to set die cut machine to deep
cuts, and lengthen the blade as well. 
 Using Xyron Adhesive Dots 3/8 assemble the flowers,
leaving the middle dots off. 
 Alcohol ink and glitter flower centers. Allow to dry then use 
Xyron Adhesive Dots 3/16 to adhere to the top of the flower. 
Use alcohol ink and ink crystal mesh (Connie Crystal)
Take Clear Scraps Frame- alcohol ink and glitter. 
Stamp sentiment (Avocado Arts) onto CutCardStock.
Cut into pennant shape. 

 Use Xyron Adhesive Dots 3/16 dots to adhere frame- 
as you can see you can't even see them!
Now assemble card using Xyron Adhesive Dots 3/8 YES
the whole card! :) 
 I took the Xyron Adhesive Dots 3/16 and 
rolled them to adhere the punched butterflies :) 
Isn't this Curious Metallic card stock super cool too? 
I set my blade on deep cut and it cut wonderfully! 
I love how it goes hand in hand with the cuts and the beautiful shimmer. 
He sure to HOP this week to Miss Kate's Cuttables:

And of course the awesome Xyron Blog:


Photobucket

Wednesday, March 5, 2014

Let's Create...Sewing Cards...

Hey there peeps!
If you loved the sewing themed cards yesterday (and I know some did) 
then you will love the set of cards today too! :) 
 I already created four cards plus an album, and
I can't wait to play some more!
I had this idea to put patterned paper behind the Clear Scraps Acrylic Button
and I love how it turned out. 
 The scissors I heat embossed to try to make them look
vintage. I think I almost melted them though! LOL 
This was an amazing kit!
Tomorrow I have a HUGE BLOG HOP coming up so stay tuned please! :) 

Happy Wednesday friends!
Photobucket

Tuesday, March 4, 2014

Card Making Fun!

 Hey there friends,
What a week so far- being iced in the house with 3 crazy boys. 
I have been having fun creating as much as possible. 
Including these fun themed cards using the new Creating Made Easy Kit. 
 From this kit, I made an entire mini album (6" Teapot)
and 4 cards and have plenty of pear left for more projects! :) 
I loved playing with the Sewing Embellishments included. 
I wrapped the spool of thread in twine too.

Photobucket

Monday, March 3, 2014

TeaPot Mini Album Sew Lovely Tutorial!

Hello friends and hello Monday!
It was a lovely weekend with the boys and I squeaked out some
time being creative. Finally things have settled down before
ball season begins next weekend. :) 
I wanted to share this lovely Teapot album I created using the 
Creating Made Easy March Kit- and how I made it...
it was chosen for the feature projects which means EVERY KIT
have a step by step tutorial with photos on how to make it. 
So I am just going to add some sneak peeks and let you know what I used. 
Xyron Teresa Collins Adhesive Kit, Stickles, Clearsnap Glitter, Liquid Pearls,
Twine, Blumenthal Lansing Buttons (inside and out) 
Xyron Adhesive Dots, and Ribbons Unlimited Ribbon. 

Spray paint all the Teapot Chipboard pages on both sides.
I used krylon spray paint in pink. 
For the cover coat edges in stickles then glitter. 
Trim out 2 lace doilies (Samantha Walker cut files).
Adhere lace doily to cover using Xyron 9" Creative Station, 
Cut 8 Scalloped circles, all 5.5".
Use Xyron Adhesive dots and Xyron Teresa Collins Adhesive Kit
to adhere stickers and embellishments to cover. 
Add Liquid Pearls to cover Set aside. 
Place scalloped circle on each page- Xyron 9" Creative Station.
Add 4X6 photo matte. Add Blumenthal Lansing Buttons and twine
one each page (check out pages below). 
I will just let you go through the photos, I have each page on here. 


I love how it turned out and I am NO girly girl!
BUT I had so much fun with this one. 
Be sure to check it out!
See y'all tomorrow!! :) 

Photobucket